WebCreator 8 - Page architecture
Introduction
It is still possible to create pages by placing items with the mouse using free positioning. But modern websites often have long pages that scroll. It then becomes difficult to handle everything. For example, if you want to add a new element at the top of the page, everything below it must be moved down. It's possible but can become a pain as the page grows. Thankfully, there is a better solution: zones. These zones, defined with panels, are containers in which you can place elements, such as texts and buttons in the example above, or other smaller containers , as we shall see in the following example.
Typically, a page will be constituted of zones: a top zone for the header, a central zone containing subzones and a bottom zone, the footer.
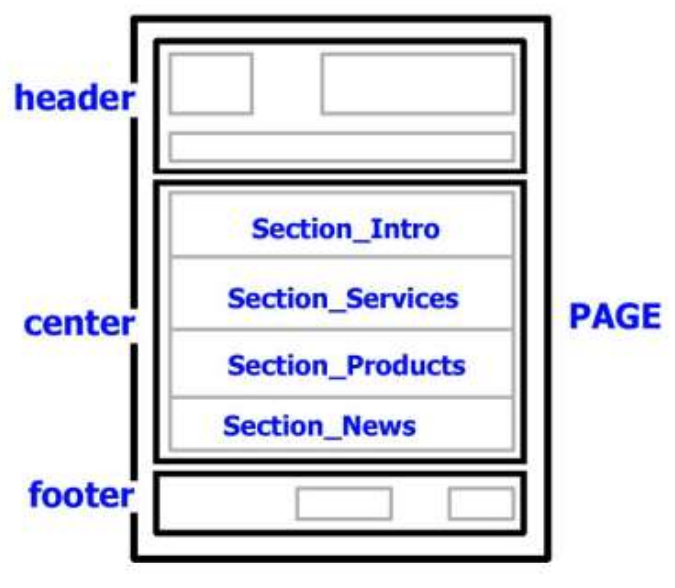
This type of organization is the architecture of template pages in WebCreator. Creating quickly modifiable and reusable pages becomes easy with this simple architecture. The zones, HEADER, CENTER and FOOTER are created using elements we call Containers.
Containers and blocks
There are two basic elements in WebCreator:
- The Base elements, used to display information. These elements include Images, Texts, Buttons and others…
- The Containers, used to define zones in which are contained other basic elements or other smaller containers, grouped to form organization units such as a product fact sheet.
The Page is the main and the largest Container. In the tree view of the elements, it is located at the top , because it contains all the other elements.
The HEADER, CENTER and FOOTER are also Containers, logically smaller than than the Page which contains them.
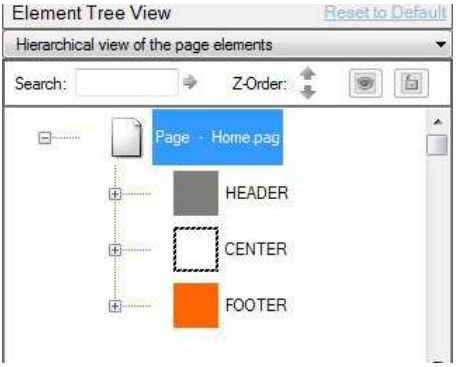
Specifically, these Containers are of the Panel type, whose main use is precisely to delimit the page architecture areas. Panels are invisible frames in which other Containers and basic Elements are placed.
Blocks
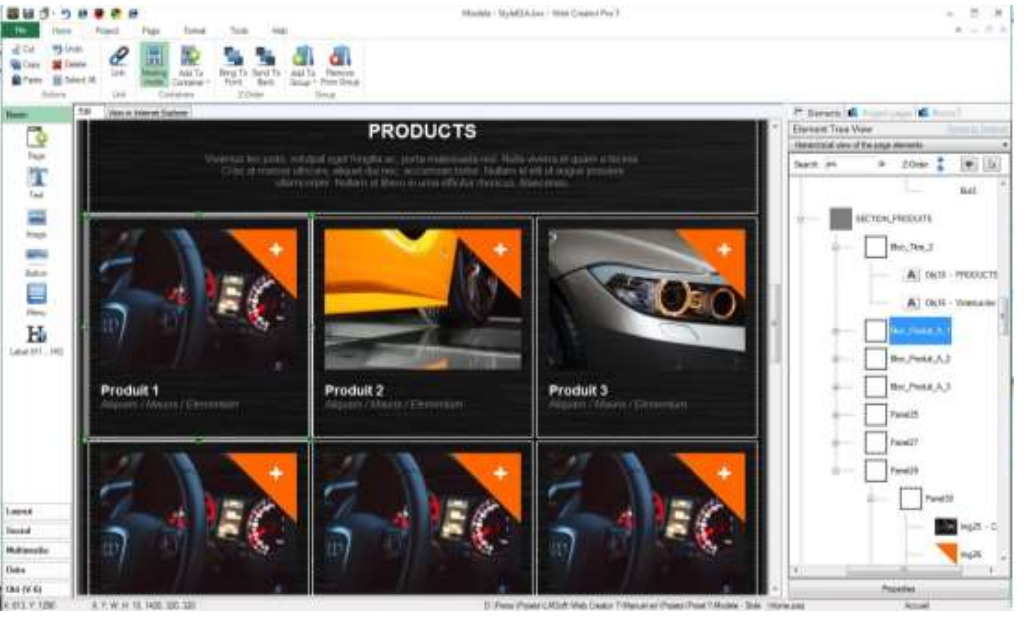
We use the term block by analogy with construction sets. A block is actually a panel that will be placed within a larger container, such as a zone. Blocks can be empty or contain elements, such as the 3 product sheets contained in the Product Section below:
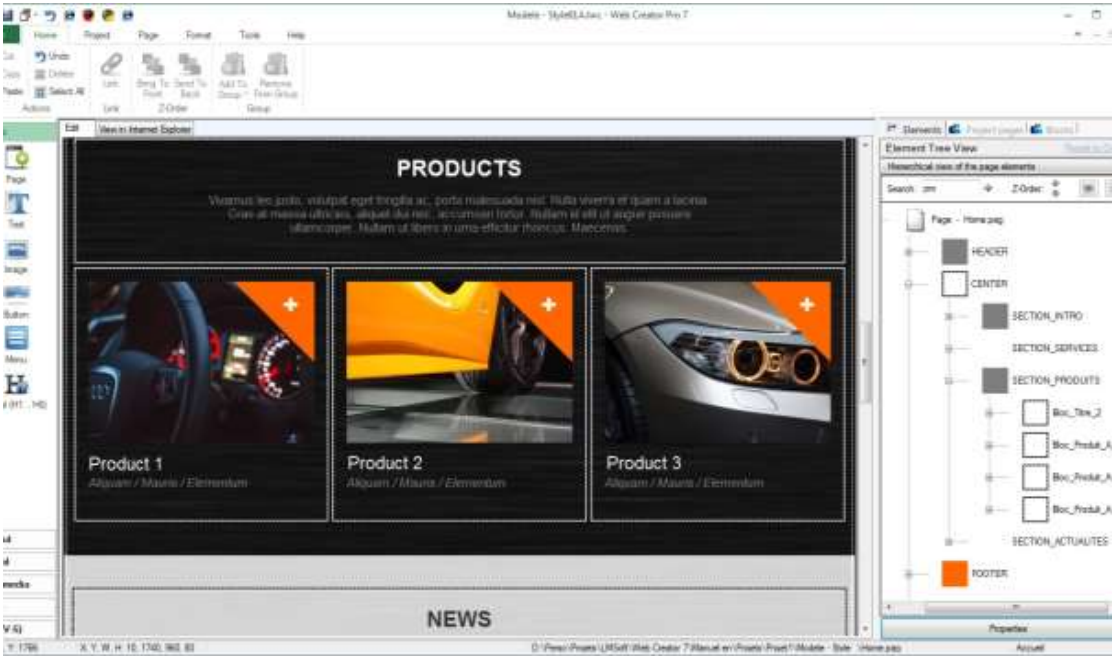
Adding blocks in a section or container
Click in the corner at the bottom right of the listing Product 1. Notice that on the right, the tree view is automatically expanded on this section to show the selected element.
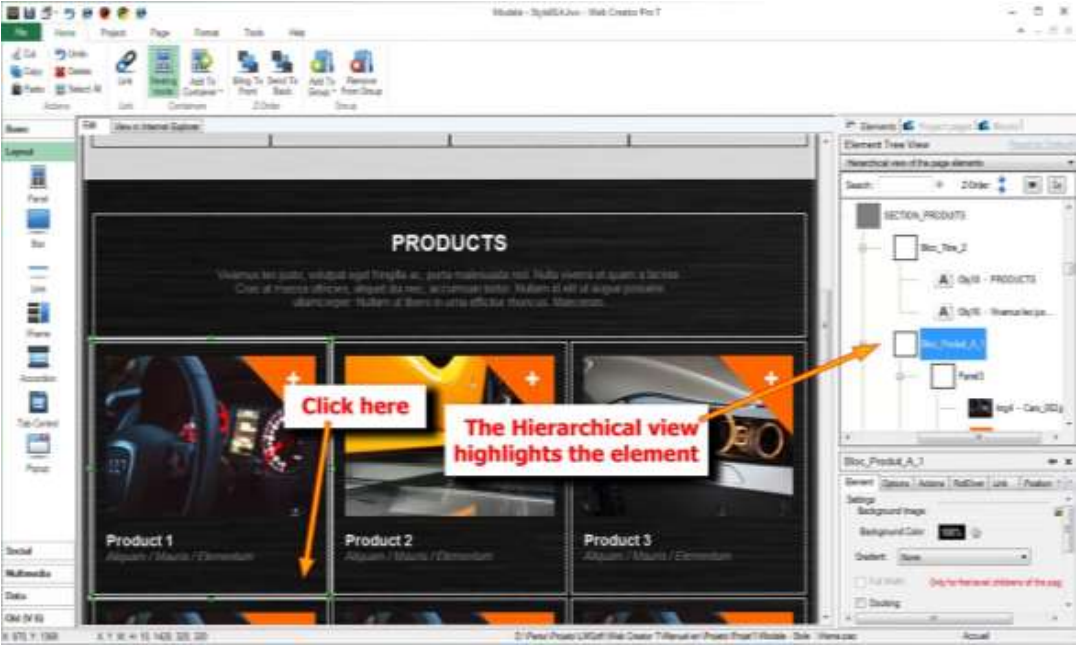
Make a copy/paste of the selected Block. The Block is positioned automatically under the other 3 and is aligned to the left. Paste the block two more times: two new product sheets are placed immediately to the right of the previous one, perfectly aligned. In addition, the height of the Section Products is adjusted automatically , pushing the rest of the page down. Magic ! . No, but close. This is called Automatic positioning or Floating Positioning. Once you understand it, no page or site will ever be too big for you.
Move a block from a section to another
When you copy / paste a block, it is automatically inserted into the container where the original was located into. To copy it to another section, select the container in the targeted section BEFORE pasting the block.
You can sometimes forget to select the destination container. You realize it when the block does not appear where you expected it. In this case, undo the last action (copying) by pressing Ctrl + Z and check, before reattempting, that you have selected the right container destination.
Generally, press Ctrl+Z everytime you do not get the expected result after the manipulations done to a Page or element. You can undo most of what was done since the last time the page was saved. Go slowly, as this is a memory eating operation.